Brownie Petit Fours Recipe
Introduction
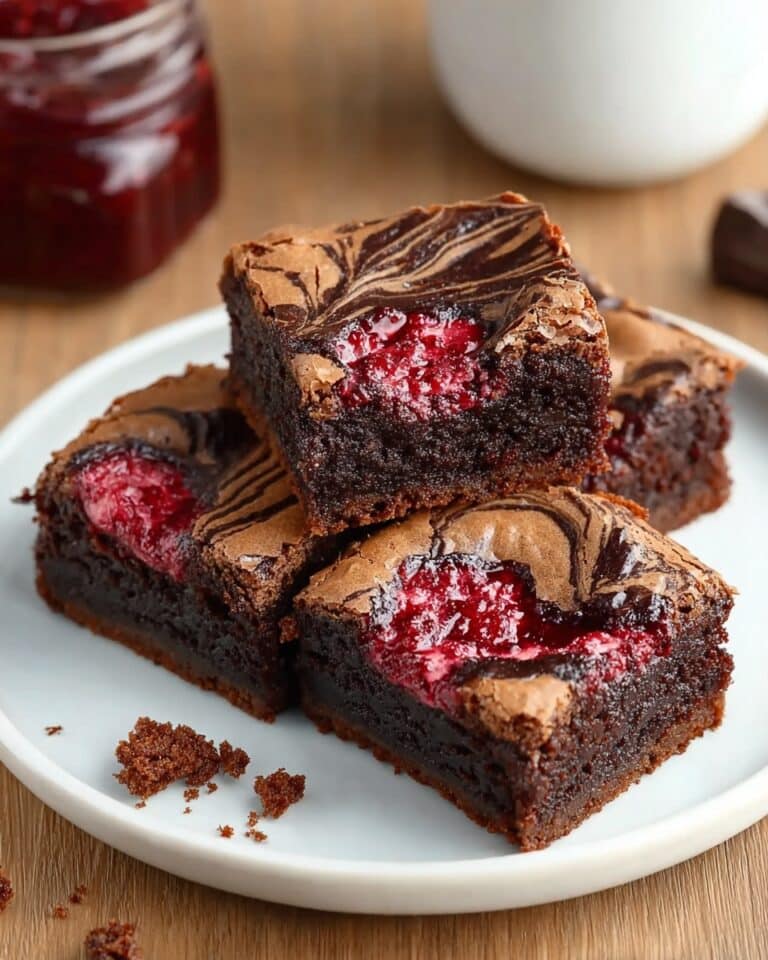
Brownie Petit Fours are delightful bite-sized treats that combine rich chocolate brownies with a smooth ganache topping. Perfect for gatherings or an elegant dessert platter, these petits fours offer a lovely balance of sweet and salty flavors with a touch of fleur de sel.

Ingredients
- 4 ounces (about ¾ cup) semisweet chocolate, chopped
- ¾ cup (12 tbsp or 165g) unsalted butter
- ¾ cup (150g) granulated sugar
- ½ cup (100g) light brown sugar
- 3 large eggs
- 1½ teaspoons vanilla extract
- 1 cup (140g) all-purpose flour
- ¾ cup (65g) cocoa powder
- ¾ teaspoon salt
- 6 ounces semisweet chocolate, chopped or in morsels
- ¾ cup (6 ounces) heavy whipping cream
- Fleur de sel, for sprinkling
Instructions
- Step 1: Preheat the oven to 350°F (175°C). Grease and line an 8×8-inch baking pan with parchment paper.
- Step 2: In a medium saucepan, melt the 4 ounces of semisweet chocolate and butter together over low heat, stirring until smooth.
- Step 3: Remove from heat and stir in granulated sugar and light brown sugar until fully combined. Add eggs one at a time, whisking after each addition. Stir in vanilla extract.
- Step 4: Sift together flour, cocoa powder, and salt. Gradually fold the dry ingredients into the wet ingredients until fully combined.
- Step 5: Pour the brownie batter into the prepared pan and smooth the top. Bake for 20–25 minutes, or until a toothpick inserted into the center comes out with a few moist crumbs.
- Step 6: Allow the brownies to cool completely in the pan. Once cool, transfer to a cutting board and cut into small squares or rectangles to create petit fours.
- Step 7: To make the ganache, heat the heavy whipping cream over medium heat until it begins to simmer. Remove from heat and pour over the chopped semisweet chocolate. Let sit for 2–3 minutes, then stir until smooth and glossy.
- Step 8: Pour the ganache over each petit four, allowing it to coat evenly. Let any excess drip off and let the ganache set for a few minutes.
- Step 9: Sprinkle fleur de sel lightly over each petit four for a perfect salty-sweet balance. Allow the ganache to set completely before serving.
Tips & Variations
- For extra richness, use bittersweet chocolate instead of semisweet in the ganache.
- You can add a teaspoon of instant espresso powder to the brownie batter to enhance the chocolate flavor.
- Use silicone molds to make perfectly uniform petit fours if you prefer shapes other than squares.
- Store the brownie petits fours in an airtight container to maintain freshness and avoid dryness.
Storage
Store the brownie petit fours in an airtight container at room temperature for up to 3 days or refrigerate for up to 5 days. To serve chilled or at room temperature, allow refrigerated petit fours to sit out for about 30 minutes. Reheating is generally not recommended as it can soften the ganache.
How to Serve

Serve this delicious recipe with your favorite sides.
FAQs
Can I use a different type of chocolate for the brownies?
Yes, you can substitute semisweet chocolate with bittersweet or milk chocolate, but keep in mind this will affect the sweetness and richness of the brownies.
How do I know when the brownies are done baking?
The brownies are ready when a toothpick inserted into the center comes out with a few moist crumbs. Avoid overbaking to keep the brownies fudgy and moist.
PrintBrownie Petit Fours Recipe

These Brownie Petit Fours are delightful bite-sized treats featuring rich, fudgy brownies topped with a silky semisweet chocolate ganache and a sprinkle of fleur de sel for the perfect balance of sweet and salty. Perfect as elegant party favors or an indulgent dessert, these petite confections combine a dense chocolate base with a glossy ganache finish.
- Prep Time: 15 minutes
- Cook Time: 25 minutes
- Total Time: 1 hour
- Yield: 16 petit fours (1-inch squares) 1x
- Category: Dessert
- Method: Baking
- Cuisine: American
Ingredients
Brownie Base
- 4 ounces (about ¾ cup) semisweet chocolate, chopped
- ¾ cup (12 tbsp or 165g) unsalted butter
- ¾ cup (150g) granulated sugar
- ½ cup (100g) light brown sugar
- 3 large eggs
- 1½ teaspoons vanilla extract
- 1 cup (140g) all-purpose flour
- ¾ cup (65g) cocoa powder
- ¾ teaspoon salt
Chocolate Ganache
- 6 ounces semisweet chocolate, chopped or in morsels
- ¾ cup (6 ounces) heavy whipping cream
- Fleur de sel, for sprinkling
Instructions
- Preheat and prepare pan: Preheat the oven to 350°F (175°C). Grease and line an 8×8-inch baking pan with parchment paper to ensure easy removal of the brownies.
- Melt chocolate and butter: In a medium saucepan, melt the 4 ounces of semisweet chocolate and the unsalted butter together over low heat, stirring constantly until the mixture is smooth and fully combined.
- Add sugars and eggs: Remove the pan from heat and immediately stir in the granulated sugar and light brown sugar until fully incorporated. Add eggs one at a time, whisking well after each addition to create a smooth batter. Stir in the vanilla extract to enhance flavor.
- Combine dry ingredients: Sift the all-purpose flour, cocoa powder, and salt together to remove lumps and evenly distribute the leavening. Gradually fold these dry ingredients into the wet chocolate mixture until just combined, making sure not to overmix.
- Bake the brownies: Pour the prepared batter into the lined baking pan and smooth the surface evenly. Bake in the preheated oven for 20 to 25 minutes, or until a toothpick inserted in the center comes out with a few moist crumbs for the perfect fudgy texture.
- Cool and cut: Allow the brownies to cool completely in the pan. Once cooled, transfer them to a cutting board and carefully cut into small squares or rectangles, shaping them into petit fours sized pieces.
- Prepare the ganache: In a clean saucepan, heat the heavy whipping cream over medium heat until it just begins to simmer. Immediately remove from heat and pour over the 6 ounces of semisweet chocolate. Let this sit undisturbed for 2 to 3 minutes, then stir gently until the ganache becomes smooth and glossy.
- Coat the petit fours: Pour or spoon the ganache over each brownie square, allowing it to coat evenly and any excess to drip off. Let the coating set for a few minutes.
- Finish with fleur de sel: Sprinkle a light pinch of fleur de sel over each petit four to enhance the chocolate’s flavor with a subtle salty contrast. Allow the ganache to set completely before serving for a beautifully finished chocolate treat.
Notes
- Ensure brownies are fully cooled before cutting to prevent crumbling.
- For an even ganache coating, use a spoon or a small offset spatula to spread the ganache evenly over each piece.
- Fleur de sel adds a gourmet touch but can be substituted with regular sea salt if unavailable.
- Store petit fours in an airtight container at room temperature for up to 3 days or refrigerate for up to a week.
- Bring refrigerated petit fours to room temperature before serving for best flavor and texture.
Keywords: brownie petit fours, chocolate petit fours, chocolate ganache, bite-sized brownies, fudgy brownies, elegant desserts