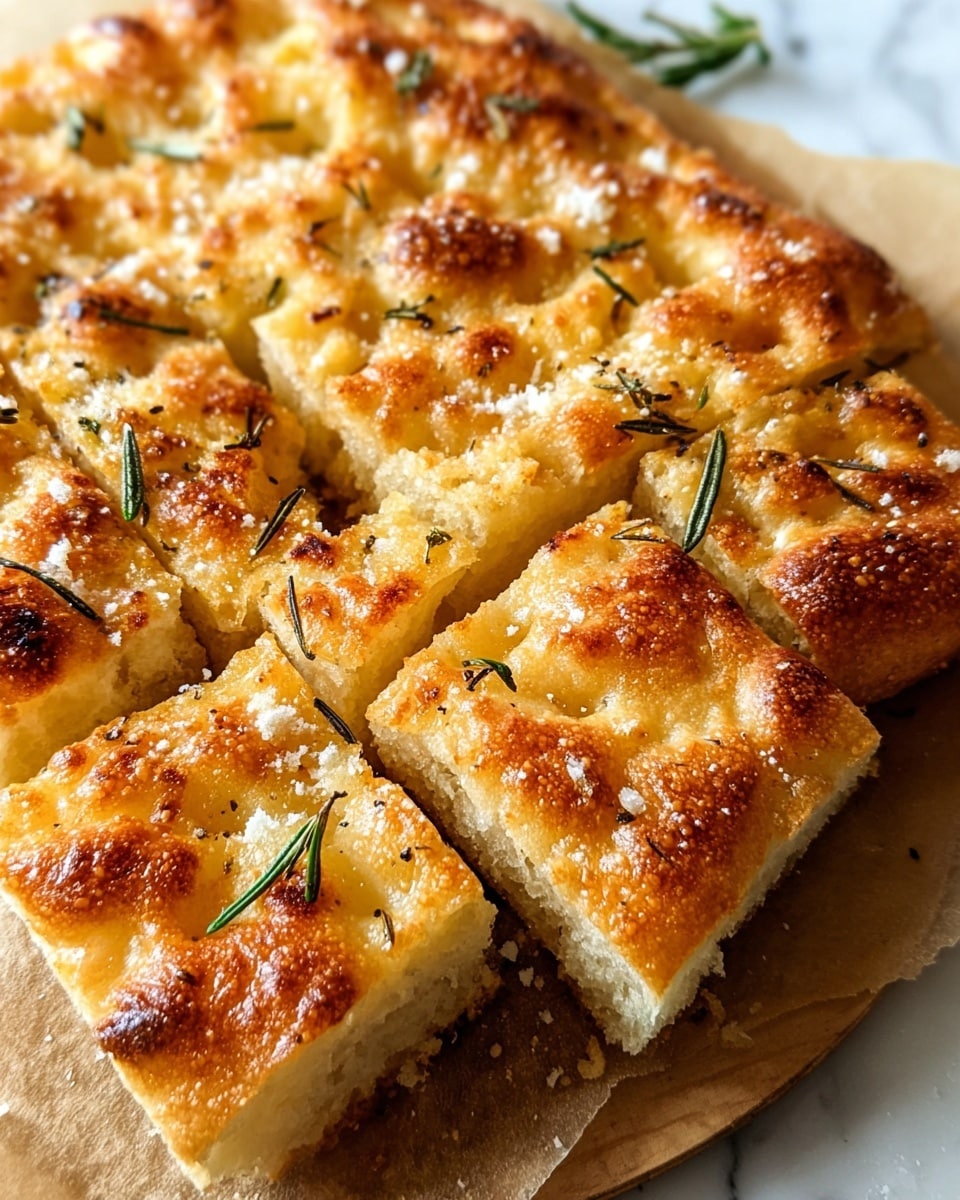
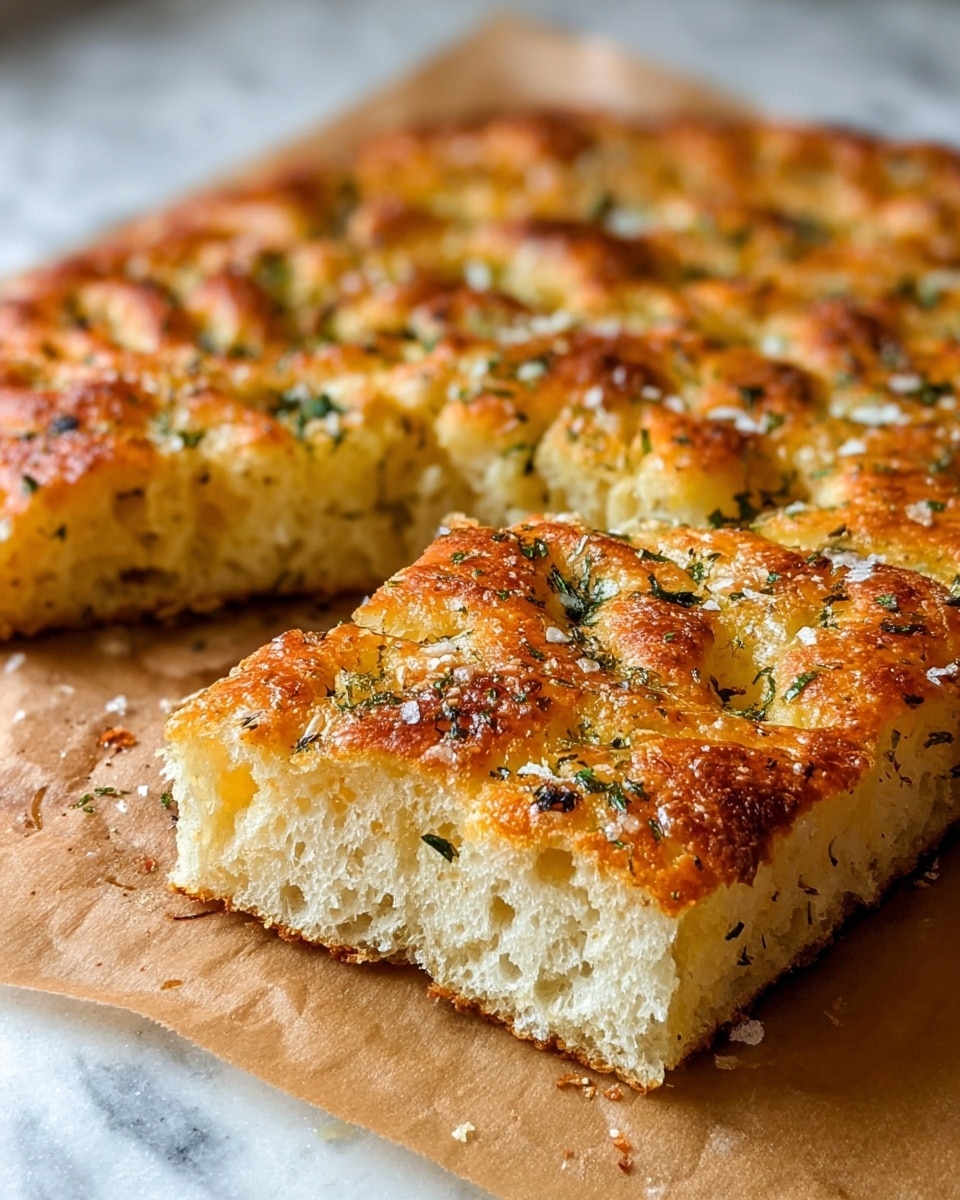
Crispy and Cheesy Garlic Parmesan Focaccia Bread Recipe
Introduction
Crispy and cheesy garlic Parmesan focaccia is a delightful bread that combines a golden crust with rich flavors. It’s perfect as a snack, appetizer, or alongside any meal. This easy recipe will have you enjoying fresh, homemade focaccia in no time.
Ingredients
- 4 cups all-purpose flour
- 2¼ teaspoons active dry yeast
- 1¾ cups warm water
- 2 teaspoons sugar
- 2 teaspoons kosher salt
- ¼ cup olive oil
- 4 garlic cloves, minced
- ½ cup freshly grated Parmesan cheese
Instructions
- Step 1: Proof the yeast by combining warm water and sugar in a mixing bowl. Sprinkle the yeast on top and let it sit for 5–10 minutes until it becomes foamy.
- Step 2: Add the flour, kosher salt, and olive oil to the bowl. Mix until a sticky dough forms. Cover the bowl and let the dough rise in a warm place for 1 to 1½ hours.
- Step 3: While the dough rises, mince the garlic and grate the Parmesan cheese. Pour olive oil into a baking pan and transfer the risen dough into it.
- Step 4: Using your fingertips, create dimples all over the surface of the dough. Sprinkle the minced garlic, grated Parmesan, and any optional herbs evenly on top.
- Step 5: Allow the dough to rise again for 20–30 minutes while preheating the oven to 425°F (220°C). Bake the focaccia for 20–25 minutes until it turns golden brown and crispy.
Tips & Variations
- For extra flavor, add fresh rosemary or thyme alongside the garlic and Parmesan.
- Use sea salt flakes instead of kosher salt for a subtle crunch on top.
- Brush the finished focaccia with additional olive oil and a sprinkle of chili flakes for a spicy kick.
- Make mini focaccias in muffin tins for easy individual servings.
Storage
Store leftover focaccia in an airtight container or wrapped tightly at room temperature for up to 2 days. To keep it longer, refrigerate for up to 4 days or freeze for up to 1 month. Reheat in a preheated oven at 350°F (175°C) for 5–10 minutes to restore crispiness.
How to Serve
Serve this delicious recipe with your favorite sides.
FAQs
Can I use instant yeast instead of active dry yeast?
Yes, you can use instant yeast. If doing so, mix it directly with the flour without proofing first, and reduce the rising time slightly since instant yeast acts faster.
What makes focaccia crispy on the outside?
The olive oil coating and high baking temperature help create a golden, crispy crust. Also, dimpling the dough allows oil and air to interact, enhancing texture and flavor.
PrintCrispy and Cheesy Garlic Parmesan Focaccia Bread Recipe

This Crispy and Cheesy Garlic Parmesan Focaccia Bread recipe delivers a golden, fluffy bread with a flavorful crust infused with garlic and Parmesan cheese. Perfectly risen and baked to crispy perfection, this focaccia is an irresistible appetizer or side that pairs beautifully with soups and salads.
- Prep Time: 15 minutes
- Cook Time: 25 minutes
- Total Time: 2 hours
- Yield: 1 large focaccia (8–10 servings) 1x
- Category: Bread
- Method: Baking
- Cuisine: Italian
Ingredients
Dough Ingredients
- 4 cups all-purpose flour
- 2¼ teaspoons active dry yeast
- 1¾ cups warm water
- 2 teaspoons sugar
- 2 teaspoons kosher salt
- ¼ cup olive oil
Toppings
- 4 garlic cloves, minced
- ½ cup freshly grated Parmesan cheese
Instructions
- Proof the Yeast: In a mixing bowl, combine the warm water and sugar. Sprinkle the active dry yeast over the liquid and let it sit for 5 to 10 minutes, or until the mixture becomes foamy, indicating that the yeast is active.
- Mix Dough: Add the all-purpose flour, kosher salt, and olive oil to the bowl with the yeast mixture. Mix everything together until a sticky dough forms. Cover the bowl and let the dough rise in a warm place for 1 to 1½ hours, or until it has doubled in size.
- Prepare Toppings: While the dough is rising, mince the garlic cloves and grate the Parmesan cheese in preparation for topping the bread.
- Shape Dough and Add Toppings: Once the dough has risen, pour some olive oil into a baking pan and transfer the dough into it. Using your fingertips, create dimples all over the surface of the dough. Evenly sprinkle the minced garlic and freshly grated Parmesan cheese on top. You may also add optional herbs if desired.
- Final Rise and Bake: Allow the dough to rise for an additional 20 to 30 minutes while preheating the oven to 425°F (220°C). Once ready, bake the focaccia for 20 to 25 minutes or until the bread is golden brown and crispy on the edges. Remove from the oven and let cool slightly before serving.
Notes
- For extra flavor, consider adding fresh rosemary or thyme along with the garlic and Parmesan topping.
- If you prefer a softer focaccia, brush the top with additional olive oil immediately after baking.
- Make sure water is warm but not hot to avoid killing the yeast.
- This focaccia is best served fresh but can be stored in an airtight container for up to 2 days.
- You can reheat leftovers in the oven to regain crispiness.
Keywords: Focaccia, Garlic Bread, Parmesan, Cheesy Bread, Italian Bread, Homemade Bread, Crispy Bread