Korean Rice Balls (Jumeokbap) Recipe
Introduction
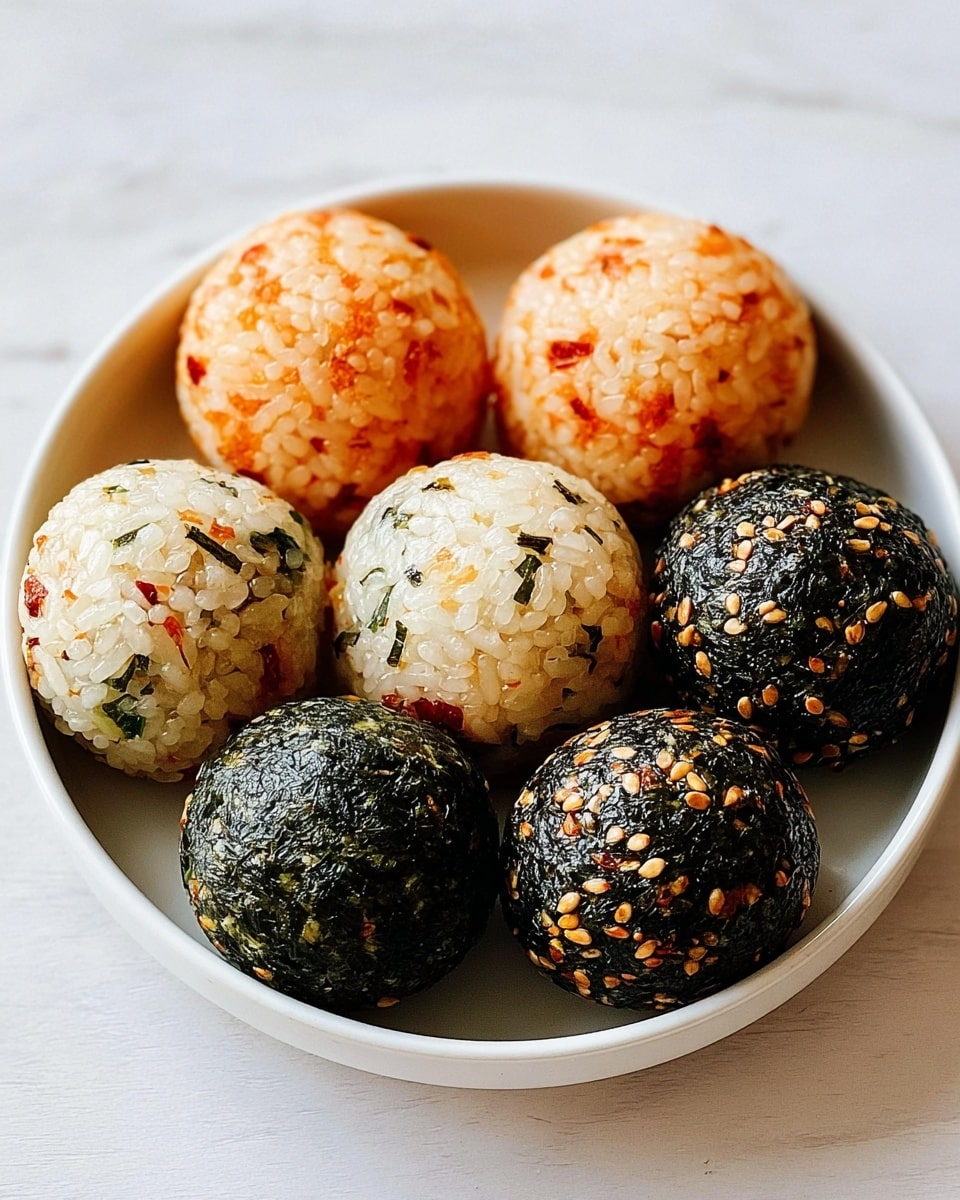
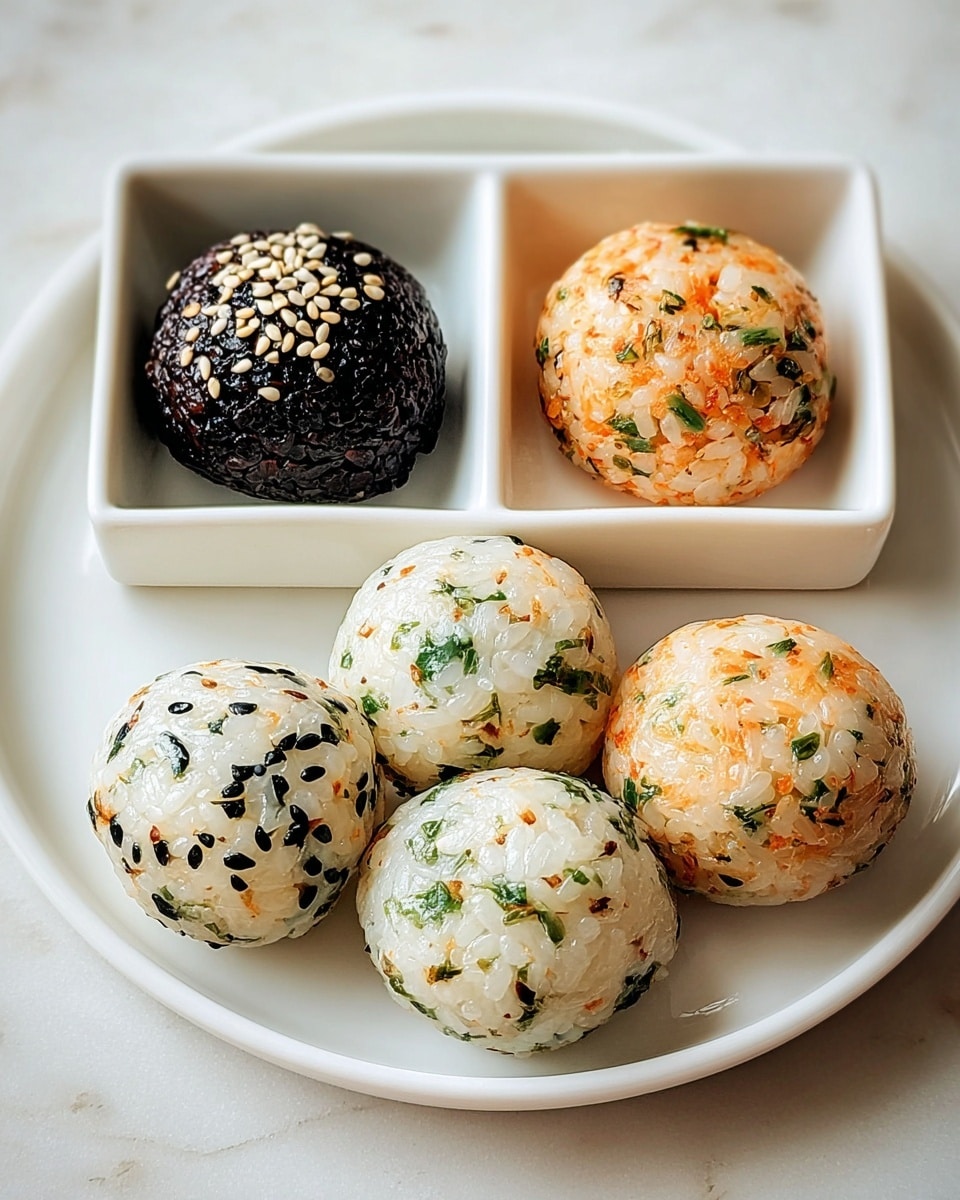
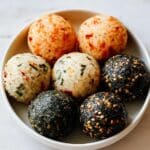
Korean Rice Balls, or Jumeokbap, are a delightful and versatile snack packed with flavor and texture. These bite-sized rice balls are perfect for lunchboxes, picnics, or a light meal. They combine savory fillings with seasoned rice wrapped in seaweed for a delicious, handheld treat.
Ingredients
- 2 cups cooked short-grain rice
- 2 tsp sesame oil
- 1/2 tsp salt
- 1/2 cup finely chopped carrots
- 1/2 cup finely chopped spinach
- 1/4 cup pickled radish, diced
- 1/2 cup ground beef (or tofu)
- 4 sheets nori, cut into strips
Instructions
- Step 1: Cook short-grain rice according to package instructions. Let it cool slightly until still warm.
- Step 2: In a bowl, combine the cooked rice with sesame oil and salt. Add chopped carrots and spinach; mix well.
- Step 3: In a separate bowl, combine pickled radish with the seasoned ground beef or tofu.
- Step 4: Lightly wet your hands to prevent sticking. Take a handful of the rice mixture, flatten it in your palm, place a spoonful of filling in the center, then wrap the rice around it tightly to shape into a ball.
- Step 5: Wrap each rice ball with a strip of nori for an extra flavor and texture boost.
- Step 6: Arrange the rice balls on a platter and serve warm or at room temperature.
Tips & Variations
- Use tofu as a plant-based alternative to ground beef for a vegetarian version.
- Add a sprinkle of toasted sesame seeds inside or on top for extra nutty flavor.
- Try mixing in kimchi instead of pickled radish for a spicy twist.
- Keep your hands wet throughout shaping to avoid rice sticking.
Storage
Store the rice balls in an airtight container in the refrigerator for up to 2 days. To enjoy, bring them to room temperature or gently reheat in a microwave without the nori to keep it crisp. For longer storage, freeze unwrapped rice balls and thaw before serving.
How to Serve
Serve this delicious recipe with your favorite sides.
FAQs
Can I use long-grain rice for Jumeokbap?
Short-grain rice is preferred because it sticks together well, making shaping easier. Using long-grain rice may result in rice balls that fall apart.
How do I keep the rice balls from drying out?
Store them in an airtight container and avoid refrigerating for too long. Wrapping with nori just before serving helps maintain texture and moisture.
PrintKorean Rice Balls (Jumeokbap) Recipe
Korean Rice Balls, known as Jumeokbap, are a delightful and portable snack made from seasoned short-grain rice filled with savory pickled radish and seasoned beef or tofu, then wrapped in nori. These flavorful rice balls combine fresh vegetables with hearty protein, making them perfect for picnics, lunchboxes, or a light meal.
- Prep Time: 15 minutes
- Cook Time: 20 minutes
- Total Time: 35 minutes
- Yield: 8 rice balls 1x
- Category: Snack
- Method: Stovetop
- Cuisine: Korean
Ingredients
Rice Mixture
- 2 cups cooked short-grain rice
- 2 tsp sesame oil
- 1/2 tsp salt
- 1/2 cup finely chopped carrots
- 1/2 cup finely chopped spinach
Filling
- 1/4 cup pickled radish, diced
- 1/2 cup ground beef (or tofu)
Assembly
- 4 sheets nori, cut into strips
Instructions
- Cook the Rice: Cook short-grain rice according to package instructions. Once done, let the rice cool slightly but remain warm to facilitate easy handling.
- Prepare Rice Mixture: In a large bowl, combine the warm cooked rice with sesame oil and salt. Add the finely chopped carrots and spinach, mixing thoroughly to evenly distribute the seasoning and vegetables.
- Prepare Filling: In a separate bowl, mix the diced pickled radish with the seasoned ground beef or tofu, ensuring the flavors are combined well.
- Form Rice Balls: Lightly wet your hands to prevent sticking. Take a handful of the rice mixture, flatten it slightly in your palm, then place a spoonful of the filling in the center. Carefully wrap the rice around the filling, pressing firmly to shape it into a compact ball.
- Wrap with Nori: Wrap each rice ball with a strip of nori for added flavor and texture.
- Serve: Arrange the rice balls on a platter and serve warm or at room temperature as a delicious snack or light meal.
Notes
- For a vegetarian option, substitute ground beef with crumbled tofu or your favorite plant-based protein.
- Make sure hands are lightly wet while shaping rice balls to prevent sticking.
- Use freshly cooked, slightly warm rice for best shaping results.
- Adjust salt and sesame oil quantities to taste.
- Jumeokbap can be stored in the refrigerator for up to 1 day; wrap tightly to maintain moisture.
Keywords: Jumeokbap, Korean Rice Balls, rice snack, Korean cuisine, easy Korean recipe, rice balls with filling, sesame oil rice balls, nori wrapped rice balls