Delicious Chicken Enchiladas Recipe
Introduction
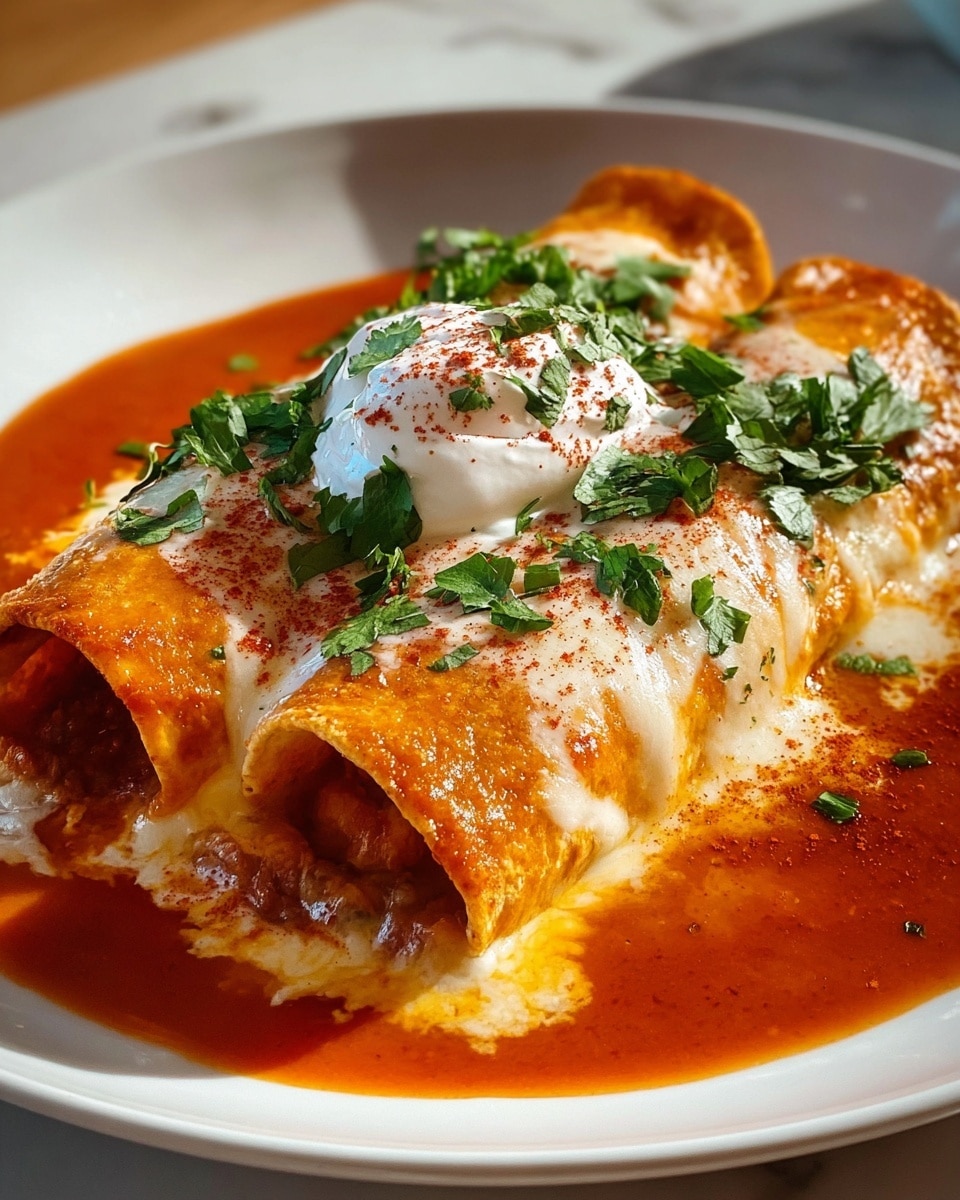
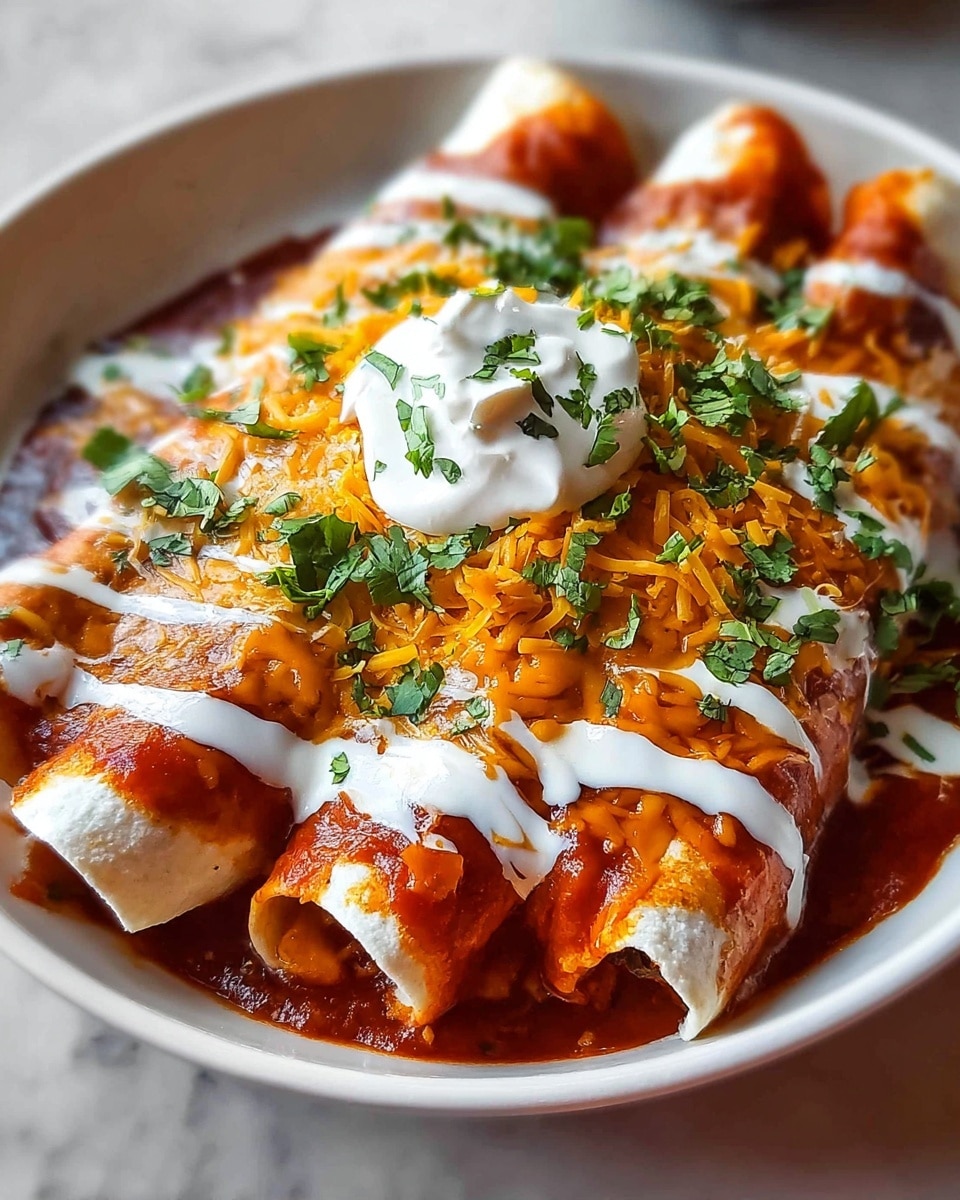
Delicious Chicken Enchiladas are a comforting and flavorful Mexican-inspired dish that’s perfect for any night of the week. Tender chicken, melted cheese, and a zesty enchilada sauce wrapped in soft tortillas make every bite satisfying and delicious.
Ingredients
- 2 cups cooked and shredded chicken (Use rotisserie chicken for convenience or cook your own.)
- 1 can red enchilada sauce (10 oz) (Choose mild or spicy based on preference.)
- 2 cups shredded Monterey Jack cheese (Melts beautifully and adds creaminess.)
- 8 pieces flour tortillas (Soft and pliable for easy rolling.)
- 1 tablespoon vegetable oil (Used for sautéing onions and garlic.)
- 1 small onion, chopped (Adds sweetness and depth to the filling.)
- 2 cloves garlic, minced (Brings a wonderful aroma and flavor.)
- 1 teaspoon cumin (Adds warmth and earthiness.)
- 1 teaspoon chili powder (Gives a nice kick and enhances flavor.)
- Salt and pepper to taste (Helps balance the flavors.)
- Chopped cilantro for garnish (Adds a pop of color and freshness.)
- Sour cream for serving (Adds creaminess and tang.)
Instructions
- Step 1: Prepare the chicken by boiling or baking until fully cooked, then shred it using two forks or your hands.
- Step 2: Heat a skillet over medium heat and add vegetable oil. Sauté the chopped onion and minced garlic until soft and fragrant, about 3-4 minutes.
- Step 3: Add the shredded chicken to the skillet with the sautéed onions and garlic. Season with cumin, chili powder, salt, and pepper. Stir and cook for another 3-5 minutes.
- Step 4: Pour a small amount of red enchilada sauce into the bottom of a baking dish to prevent sticking.
- Step 5: Take a flour tortilla, place a generous spoonful of the chicken mixture in the center, sprinkle with shredded cheese, and roll tightly. Place seam side down in the baking dish. Repeat until all tortillas are filled.
- Step 6: Pour the remaining enchilada sauce over the top of the rolled enchiladas and sprinkle with the rest of the shredded cheese.
- Step 7: Cover the dish with foil and bake in a preheated oven at 375°F (190°C) for 20-25 minutes. Remove the foil and bake for an additional 5-10 minutes until cheese is bubbly and slightly golden.
- Step 8: Let the enchiladas rest for a few minutes before serving. Garnish with chopped cilantro and serve with sour cream.
Tips & Variations
- Use rotisserie chicken to save time without sacrificing flavor.
- For extra heat, add chopped jalapeños to the filling or use a spicy enchilada sauce.
- Swap Monterey Jack cheese with cheddar or a Mexican cheese blend for a different flavor.
- Try corn tortillas instead of flour for a more traditional taste.
- Add black beans or corn to the filling to boost texture and nutrition.
Storage
Store leftovers in an airtight container in the refrigerator for up to 3 days. To reheat, cover with foil and warm in the oven at 350°F (175°C) until heated through, about 15-20 minutes. You can also microwave individual portions, but baking helps keep the texture better.
How to Serve
Serve this delicious recipe with your favorite sides.
FAQs
Can I make these enchiladas ahead of time?
Yes, you can assemble the enchiladas a day ahead and refrigerate them covered. Bake them just before serving to ensure the cheese melts perfectly and the dish is hot.
Can I freeze chicken enchiladas?
Absolutely. Wrap the assembled dish tightly in foil and place it in a freezer-safe container. Freeze for up to 2 months. Thaw overnight in the refrigerator before baking as directed.
PrintDelicious Chicken Enchiladas Recipe

This Delicious Chicken Enchiladas recipe features tender shredded chicken simmered with aromatic spices, wrapped in soft flour tortillas, smothered in rich red enchilada sauce, and topped with melted Monterey Jack cheese. Baked to perfection, these enchiladas are easy to make and perfect for a comforting meal, garnished with fresh cilantro and served alongside tangy sour cream.
- Prep Time: 15 minutes
- Cook Time: 35 minutes
- Total Time: 50 minutes
- Yield: 8 enchiladas (serves 4-6 people) 1x
- Category: Main Course
- Method: Baking
- Cuisine: Mexican
Ingredients
Filling
- 2 cups Cooked and shredded chicken (Use rotisserie chicken for convenience or cook your own.)
- 1 small Onion, chopped
- 2 cloves Garlic, minced
- 1 teaspoon Cumin
- 1 teaspoon Chili powder
- To taste Salt and pepper
- 1 tablespoon Vegetable oil
Sauce and Assembly
- 1 can Red enchilada sauce (10 oz) (choose mild or spicy based on preference)
- 8 pieces Flour tortillas (soft and pliable for easy rolling)
- 2 cups Shredded Monterey Jack cheese
Garnish and Serving
- Chopped cilantro (for garnish)
- Sour cream (for serving)
Instructions
- Prepare the chicken: Boil or bake chicken until fully cooked. Once cooled enough to handle, shred the chicken using two forks or your hands.
- Sauté aromatics: Heat vegetable oil in a skillet over medium heat. Add the chopped onion and minced garlic, cooking for 3-4 minutes until they become soft and fragrant.
- Mix chicken filling: Add the shredded chicken to the skillet with the sautéed onions and garlic. Season with cumin, chili powder, salt, and pepper. Stir well and cook together for another 3-5 minutes to combine flavors.
- Prepare baking dish: Pour a small amount of red enchilada sauce into the bottom of a baking dish to prevent sticking.
- Assemble enchiladas: Take each flour tortilla and spoon a generous amount of the chicken mixture into the center. Sprinkle with shredded Monterey Jack cheese, then roll the tortilla tightly and place seam side down in the prepared baking dish. Repeat until all tortillas are filled.
- Add sauce and cheese: Pour the remaining enchilada sauce evenly over the top of the rolled enchiladas, then sprinkle with the rest of the shredded cheese.
- Bake enchiladas: Cover the baking dish with foil and bake in a preheated oven at 375°F (190°C) for 20-25 minutes. Remove the foil and bake for an additional 5-10 minutes until the cheese is bubbly and slightly golden.
- Garnish and serve: Allow the enchiladas to rest for a few minutes after baking. Garnish with chopped cilantro and serve warm with sour cream on the side.
Notes
- You can use rotisserie chicken to save time on cooking and shredding.
- Adjust the level of chili powder or enchilada sauce spiciness according to your taste preferences.
- For a healthier option, use low-fat cheese and whole wheat tortillas.
- Make ahead by assembling enchiladas and refrigerating before baking; add extra baking time if starting cold.
- Leftover enchiladas can be stored in the refrigerator for up to 3 days and reheated in the oven or microwave.
Keywords: Chicken enchiladas, baked enchiladas, Mexican chicken recipe, shredded chicken, cheesy enchiladas, easy dinner